
A Conversation with Alejandro Javaloyas
A Studio Visit During the La BIBI Residency
The COA is a document that you’ll need, sooner or later, throughout your career. One day, a collector, art dealer, or gallery will ask you for such a document—most often when a sale occurs. It is a mark of assurance for collectors that can impact the potential resale value of the artwork if your career would skyrocket. As the artist, it gives you total and legal control over which creations you declare as part of your artistic oeuvre—think of distinguishing sketches, failed pieces, or commissions from official works. Additionally, it is an excellent sign to galleries and institutions when they see that you handle this aspect professionally and in line with the unwritten rules of the art world.
The great thing is that creating such a Certificate of Authenticity is actually really simple. Numerous online sources make it sound very complex or even rather expensive with subscription plans when all you need is a single template that contains all the right, necessary information. Throughout this article, we’ll often refer to our CAI Certificate of Authenticity Template, a template priced at the most modest price when comparing other online alternatives, to make your life as an artist easier and create COAs efficiently and professionally. If you opt to use this template, you will be using the very same format that is being used today by successful, emerging, and established artists. If you would prefer to make your own, make sure to read the article below, as we will discuss the most important information you need to include in a COA. Let’s go ahead and get started.

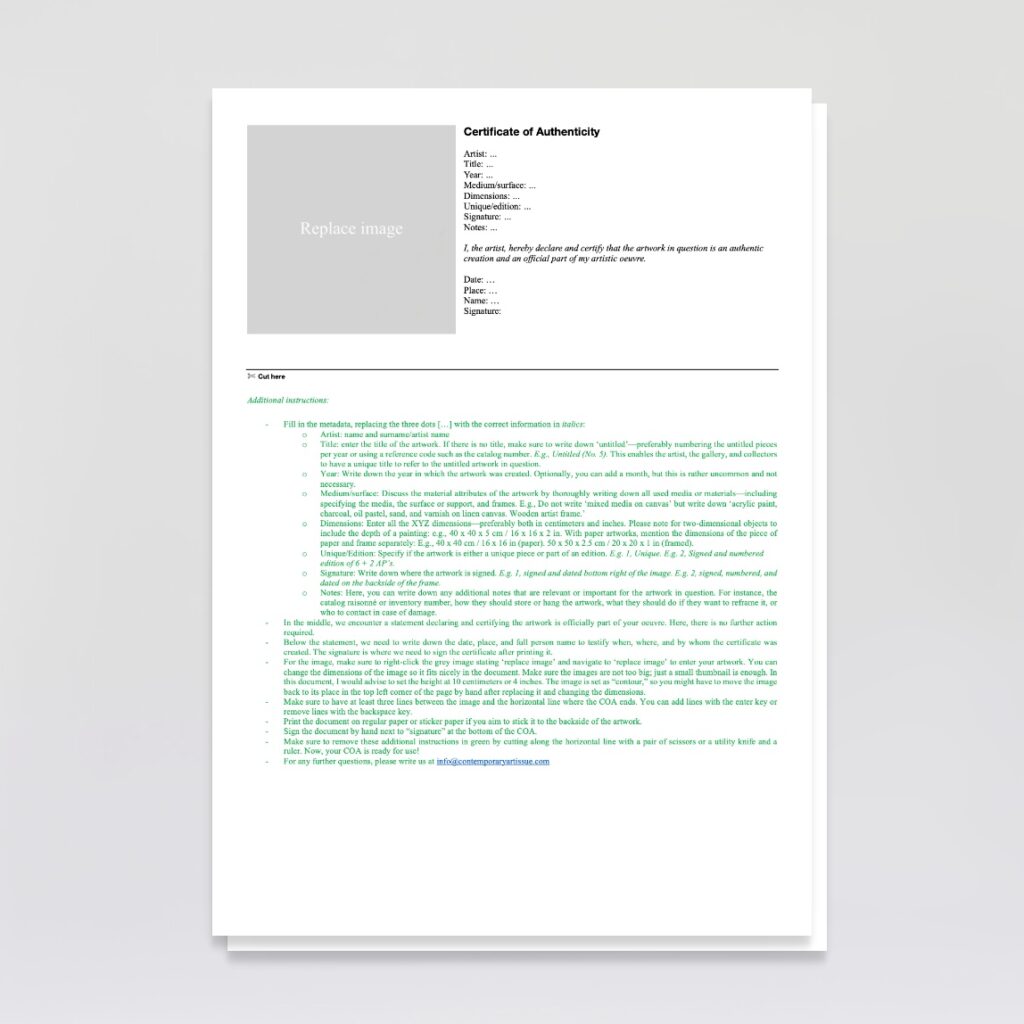
Generally speaking, at the top of the COA, the heading consists of the name of the document: “Certificate of Authenticity.” Make sure this is clearly visible, and use a large or bold font to distinguish the header from the body of the document.
This step is sadly often forgotten by artists or other online guides on how to create your COA, but it is important to include an image of the artwork in question so there can be no confusion whatsoever about the designated artwork for which the COA was created. Make sure the image shows the entire artwork. Avoid cropped details that do not show the artwork in its entirety while simultaneously avoiding pictures in which the artwork is rather small—for instance, an exhibition view. Make sure the artwork is isolated. Never use pictures where the artist, a viewer, or an object poses next to it. Don’t present it in an interior, either. Just use a high-resolution image showing the complete artwork. The size of the image is entirely up to you, depending on your design and preference. If you create your artist resume on a large A4 format, it can be large. However, if you go for a smaller size, which is often more subtle and professional, a thumbnail image can be sufficient as well. Our CAI Template provides both options.
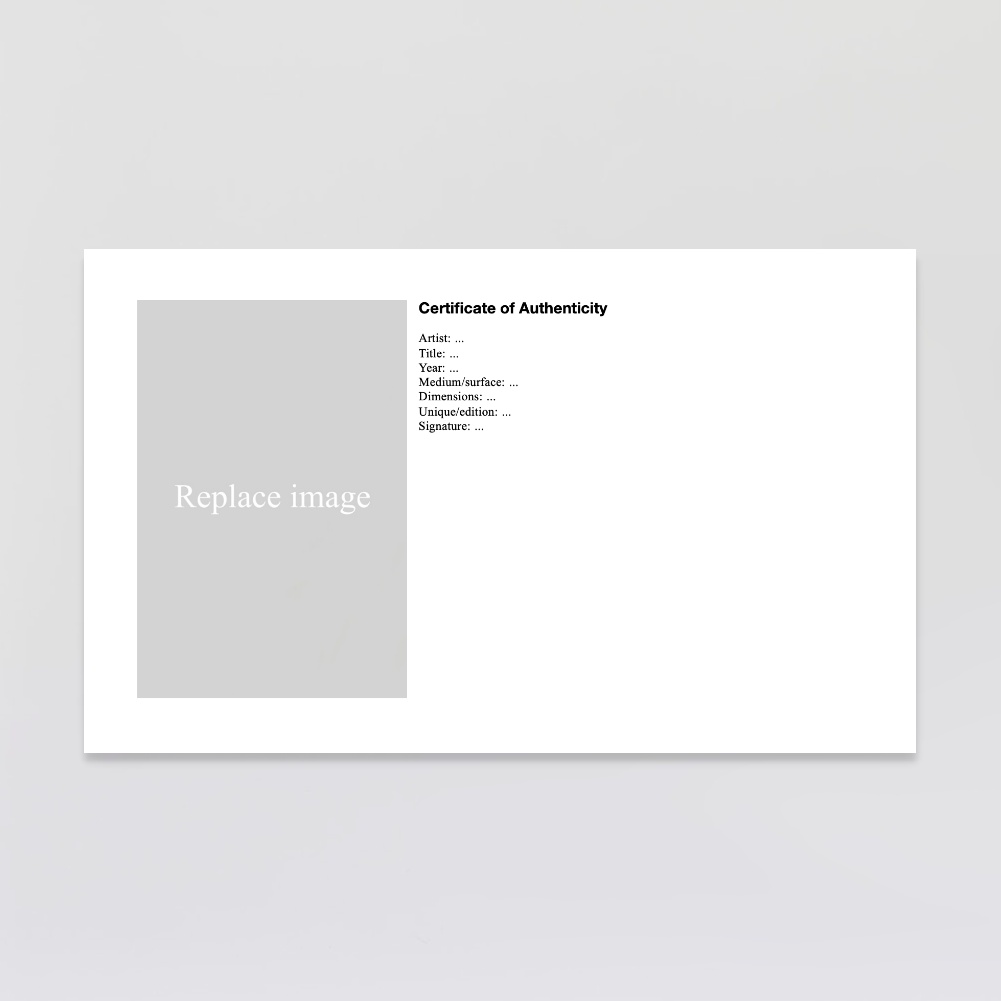
Make sure to enter all the required metadata in the COA, starting with the artist’s name and surname, or artist name. Next, we have the title of the artwork. If there is no title, please write down ‘untitled’ and an inventory/catalog code so you can refer to it specifically. With untitled works, an image of the artwork is once more essential and useful. Up next, write down the year in which the artwork was created. Then, write down the medium and surface, mentioning the technique in which you specify all the media you used. Don’t write down ‘mixed media,’ but document all mediums you have used. Later, this can be important for conservatory purposes, a future catalog raisonné, or institutional exhibitions. You can write down the artwork’s dimensions in the following line or section. Please write down all XYZ dimensions, both in centimeters and in inches. If the artwork is framed, write down the dimensions of the artwork itself and when being framed. Optionally, you could also specify where and how the artwork is signed. And to conclude the primary metadata, write down if the artwork is unique or part of an edition. In case of the latter, make sure to specify the edition.
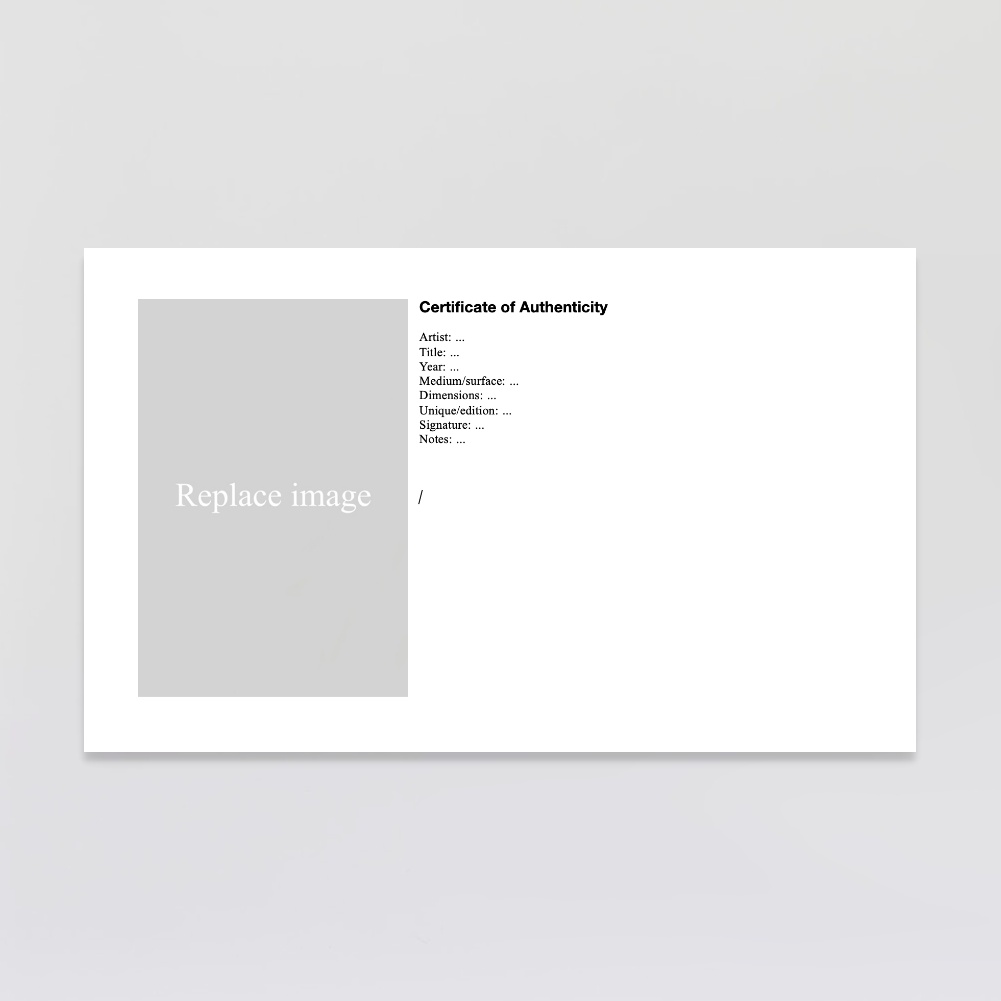
You can include a section with notes, remarks, or additional information. Only do this if it is relevant to necessary. For instance, writing the meaning of the artwork or an interpretation is not relevant from a COA point of view. Whereas additional instructions on how to frame, install, or conserve the artwork are. Other options are the Catalog Raisonné number of the artwork in question if the artist has such a document, who to contact in case of damage, or when the collector would like to reframe the piece.

Make sure to include a statement in which you formally declare that the artwork is an official part of your oeuvre. Feel free to copy and paste the authenticity statement from our CAI Template:
I, the artist, hereby declare and certify that the artwork in question is an authentic creation and an official part of my artistic oeuvre.
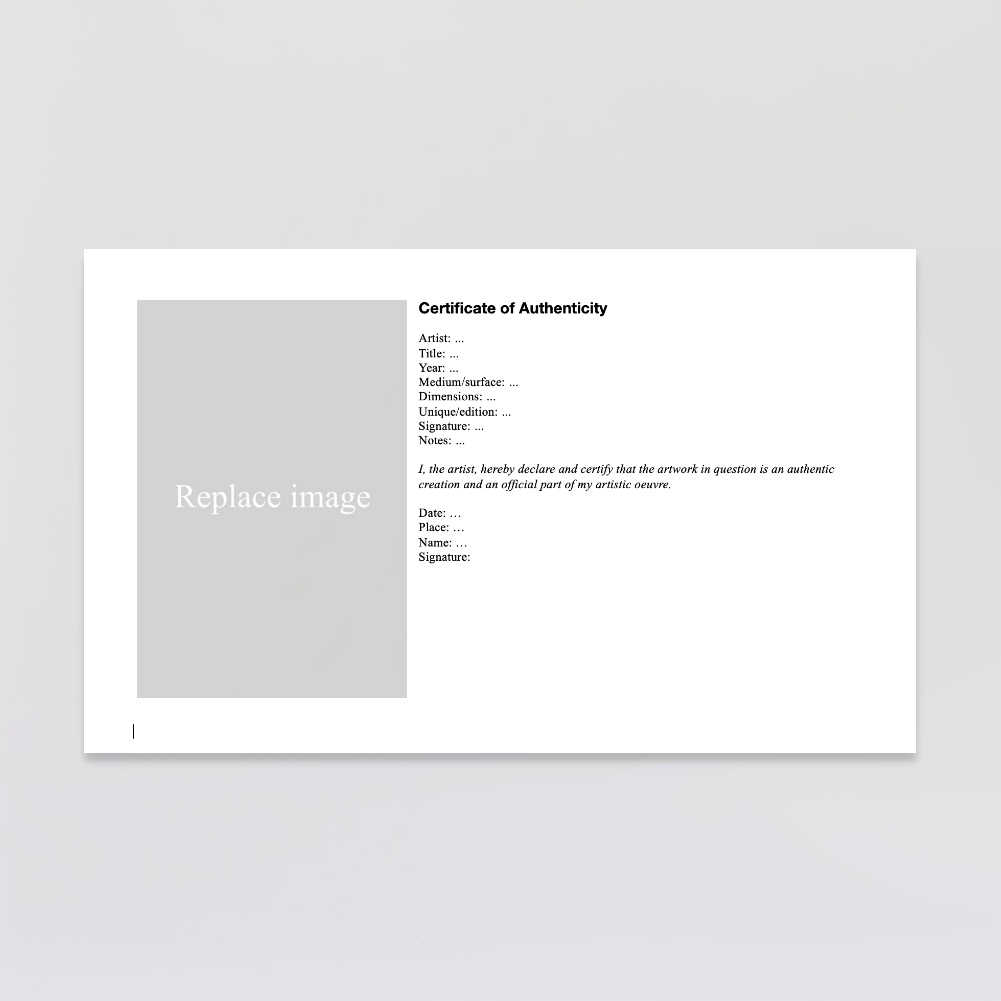
To make the document official, we need to write down when, by whom, and where the document was created, followed by a signature by hand. Of course, you can only complete this step after printing it, but you have to make sure that this part is mentioned in your template so there is a designated place in the document to sign it. You can also write down your name, the date, and the place, in advance, before printing it.
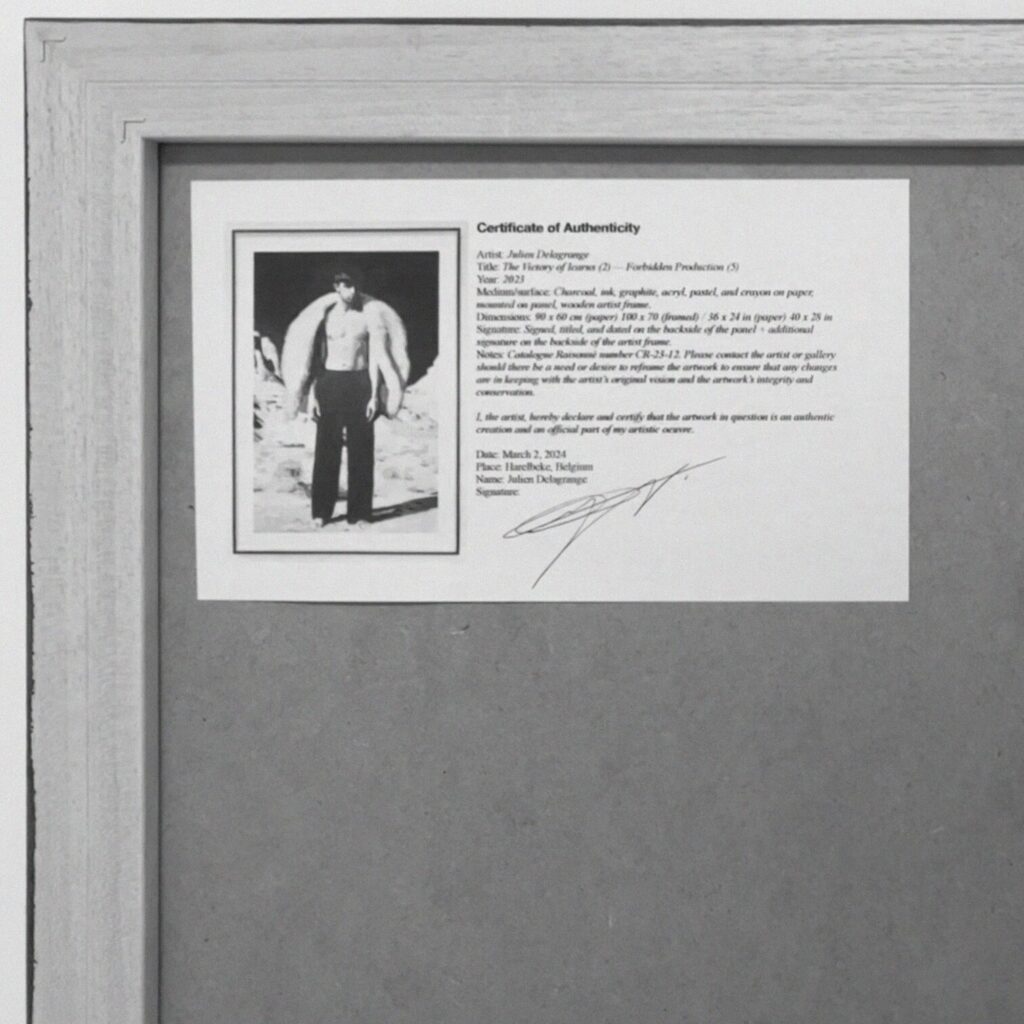
Having completed the six steps above, it is now time to print your document, sign it to make it official, and use it. There are different ways you can use it, but the most important thing is that it arrives well with the collector. You can sign and laminate it and hand it over to the collector. You could simply print it and send it by post in an envelope. Or, when there is a solid backside or base, you can print the COA directly onto white sticker paper to peel and paste it onto the artwork (see example and the left).
When it comes to the overall design of a COA, all too often—and especially when reviewing the templates available on the World Wide Web—people tend to design it in an obsolete fashion to make it look more authentic, as if the certificate is for an Old Master painting. However, for contemporary art, this, of course, is unnecessary and even unauthentic. Use a simple and clean design that is in line with the tone of the art world, using a white backdrop and a small, black, or dark grey font. Now that you have designed your COA, make sure to save your design to reuse it efficiently for future pieces, or simply consider using our CAI Certificate of Authenticity Template, to maintain consistency and also to avoid making things more complicated or time-consuming than they should be.
Please find our CAI Certificate of Authenticity Template here, and feel free to discover more career tools for artists to professionalize your art practice and business in minutes, sharing industry-approved templates, tools, and spreadsheets that are being used in the high-end art world today. The COA Template is priced at an utmost modest price as it is our goal to provide affordable support and tools, including industry-approved information free of charge, to empower artists to pursue success in the highest realms of the art world.
Last Updated on March 15, 2024


A Studio Visit During the La BIBI Residency
A Reasoned Anthology